In this project, our engineers are building a V-Slot Christmas Tree using programmable LED strips and aluminium framing.
We’re breaking the full build into short video steps, from soldering and wire preparation to final assembly and showroom display.
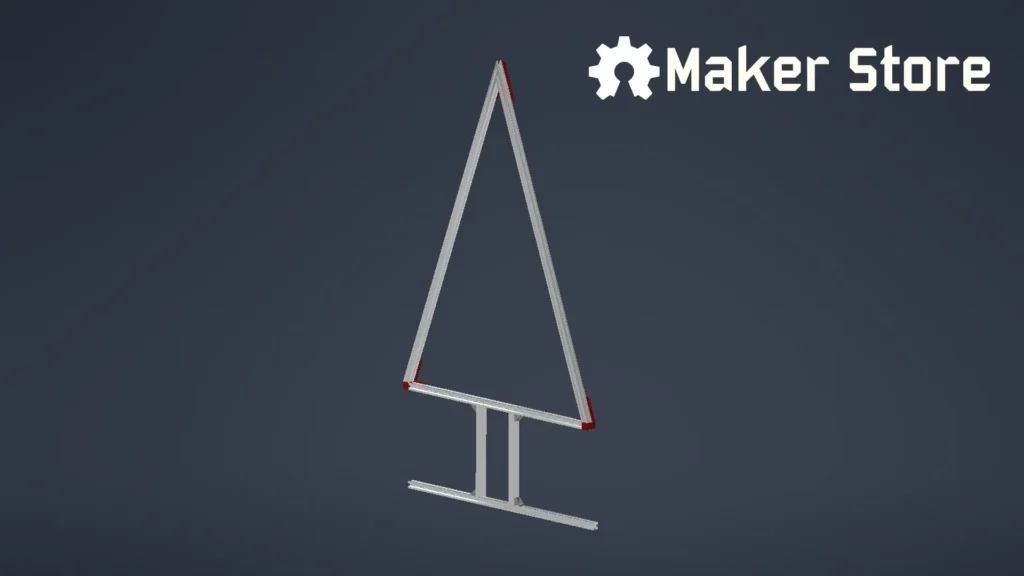
To help you understand the structure of the build, we’ve also included CAD files and drawings below.
Project Files & Drawings
To support this project, we’re providing the following design resources:
-
3D CAD Files — Full assembly model of the V-Slot Christmas Tree (3D CAD preview below)
-
Dimensioned Drawing — Overall tree dimensions and layout
- 3D Printable Connector Files (IPT & STEP) — Custom connector used in this build
Part 1 — Soldering the LED Strip
In Part 1, we solder the programmable LED strip to the shielded 4-core cable to prepare it for installation inside the V-Slot.
This step ensures a reliable electrical connection before the LED strip is installed into the aluminium framing.
Parts used in this step:
Part 2 — Heat Shrink Wire Insulation
After soldering, the exposed wires are insulated using heat-shrink tubing and a heat gun.
This process protects the electrical connections, and improves long-term reliability.
Proper wire insulation is especially important when wiring LED projects that will be handled and installed into tight profiles like V-Slot.
Parts used in this step:
-
Heat Gun
Part 3 — Assembling the V-Slot Frame
Next, the individual V-Slot sections are assembled to form the main frame of the Christmas tree.
This step focuses on aligning the profiles correctly so the structure remains stable and symmetrical.
V-Slot framing makes it easy to build custom shapes while keeping the assembly process simple and repeatable.
Parts used in this step:
Part 4 — Installing LED Strip into V-Slot
In Part 4, the LED strip is carefully slid into the V-Slot extrusion, then covered by the V-Slot Cover
This keeps the wiring hidden while creating a clean, integrated lighting effect within the aluminium frame.
At this stage, the shape of the Christmas tree begins to take form as the illuminated structure starts to come together.
Parts used in this step:
Part 5 — Installing Hidden Corner Brackets
To strengthen the base of the tree, Inside Hidden Corner Brackets are installed.
These brackets provide extra rigidity while keeping the exterior of the frame clean and uncluttered.
Hidden connectors are ideal for builds where both strength and appearance are important, such as display pieces or showroom projects.
Parts used in this step:
Part 6 — Power On and Showroom Display
In the final step, the LED system is powered on and the completed V-Slot Christmas Tree is placed in our showroom.
With the programmable LEDs running, the project comes to life and adds a festive touch to the workspace.
This build shows how V-Slot framing and addressable LED strips can be combined for creative decorative projects, displays, and custom installations.
Conclusion
If you’re planning your own LED or framing project, V-Slot is a versatile system that can be adapted to a wide range of custom builds — from workshop fixtures to creative display pieces.
With the provided CAD files and drawings, you can easily modify this design to suit your own space or lighting setup.
Follow us on social media to see more behind-the-scenes builds, product demos, and custom projects from our engineering team.
Happy making!