Intro
On July 20th 1969, the Apollo 11 crew became the first humans to walk on the moon. At Maker Store, we decided to celebrate by making our own DIY WLED Rocket Lamp out of plywood and acrylic, and lighting it with multicolour LEDs. Follow this guide if you want to make your own rocket lamp.
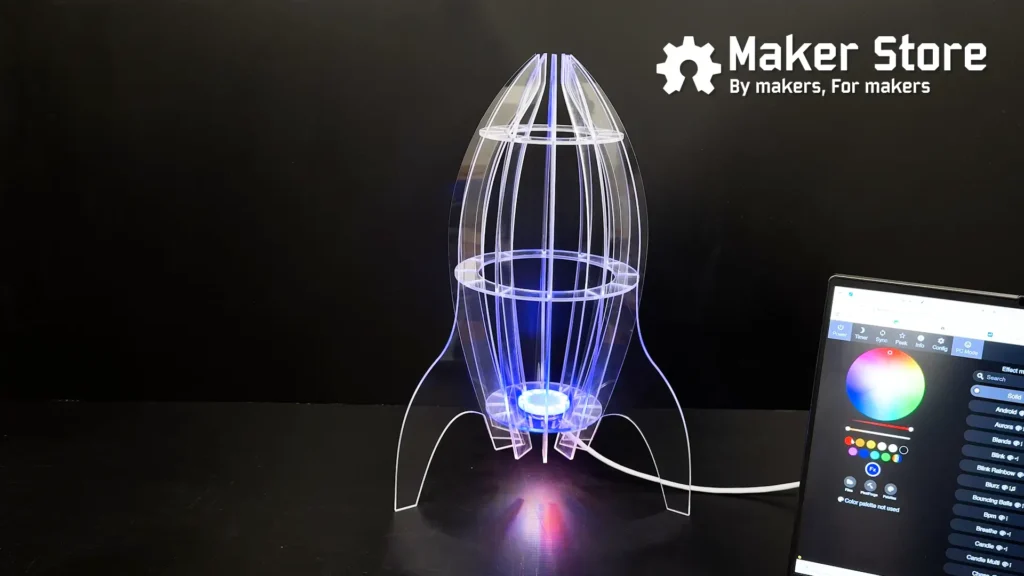
BOM (for one DIY WLED Rocket Lamp)
| QTY | Hardware Required | SKUS |
| 1 | WeMos – D1 mini PRO microcontroller development board | ELEC-WEMOS-PRO |
| 1 | Addressable WS2812 5050 RGB Neopixel Rings – 12 Bit MakerBotics | MB-ELC-LED-RGBMOD-12BIT |
| 1 | Addressable WS2812 5050 RGB Neopixel Rings – 7 Bit MakerBotics | MB-ELC-LED-RGBMOD-7BIT |
| 1m | Shielded 3 Core Cable 7/0.5 | ELEC-CABLE-3S-705 |
| 1 | Hook Up Cable – 1 Core 0.5mm – Black | ELEC-CABLE-1C-105-BK |
| 1 | Hook Up Cable – 1 Core 0.5mm – Blue | ELEC-CABLE-1C-105-BL |
| 1 | Hook Up Cable – 1 Core 0.5mm – Red | ELEC-CABLE-1C-105-RD |
| 5 | M2x5mm Bolt w/ Nut | |
| 2 | M3 Button Head Screws | SCREWS-M3-BH-10 |
| 1 | 3D Printed D1 Mini Case | |
| 1 | 3D Printed Diffuser | |
| 1 | 800x500mm Sheet of 3mm Acrylic | MAT-PER-SG |
| 1 | 800x500mm Sheet of 3mm Plywood |
Software
This project utilises WLED, an open-source software that allows the wireless control of lighting through the ESP32 platform. The WLED system can control numerous multicolour LED strips or rings, and can control each individual LED to create effects. Once programmed, a WLED system can be configured using a phone or computer and can be operated remotely using an official or ESP-based remote control. For our project, we will install WLED on a D1 Mini ESP8226 board.
- Plug the ESP board into a USB port on a computer and navigate to https://install.wled.me/ to access the WLED Web Installer
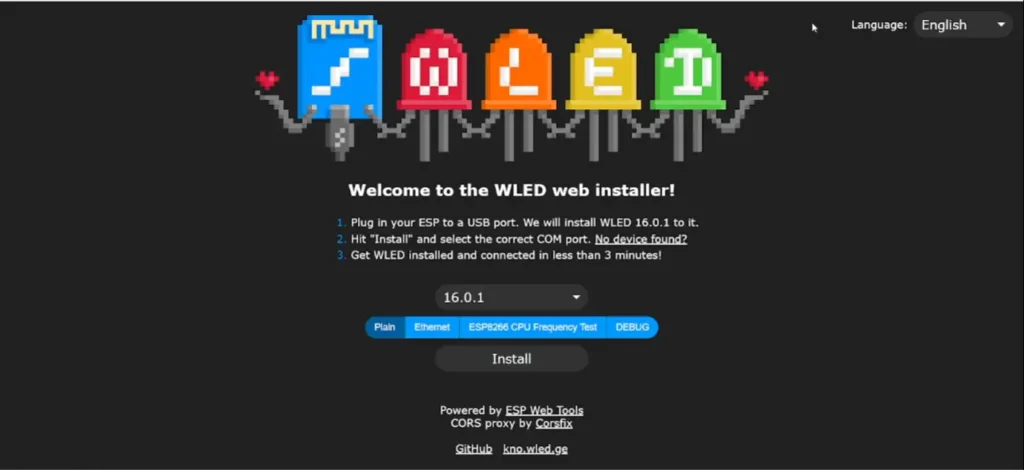
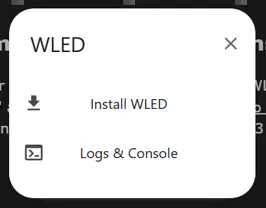
- Choose “install” and select the appropriate COM port connected to the ESP board. The installer will then clear any existing code off the board and upload the WLED software.
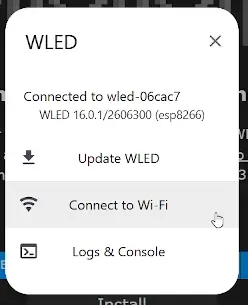
- Connect the WLED ESP to the internet to allow for wireless control from other devices on the same network; at this stage you can also connect it to your home assistant.
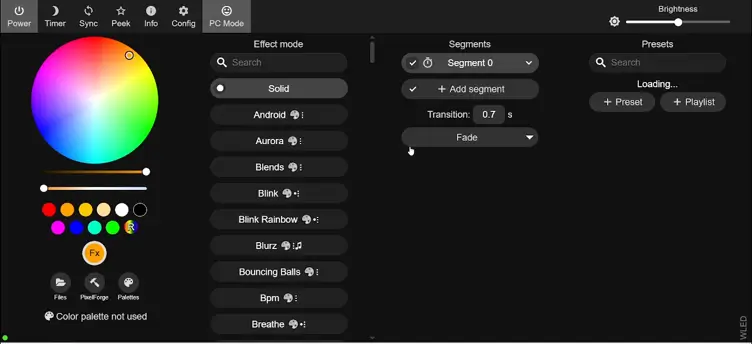
- Choose “Visit Device” to access the control panel. The IP address in the URL is the device address and can be used to control the WLED ESP in the future.
Files
The laser cutting files for this project were adapted from the Stubby Rocket project by bruce_cooner on Thingiverse. For this project, the rocket was scaled to be 400mm tall, and adjustments were made to the slot width to accommodate both 3mm plywood and acrylic panels.
The project files are available in the following formats:
- DXF – for laser cutting and CNC software
- PDF – for viewing and printing
- STEP – for CAD software, allowing you to view or modify the 3D assembly
Download Plywood Rocket File (.dxf)
Download Acrylic Rocket File (.dxf)
Download MoonDayRocket (.stp)
Electronics and Assembly for Your DIY WLED Rocket Lamp


- Cut the rocket files out of either 3mm Laser Ply or 3mm Cast Acrylic. Before cutting all the files, test that the slots are the right width to fit within each other without overstressing the material
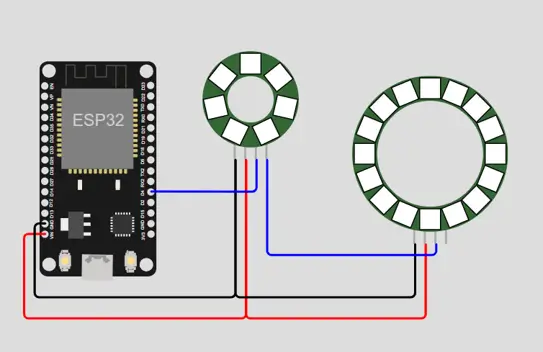
- Solder the blue hook-up wire to the DO pin of the 7-bit LED ring. Repeat this process with the red and black hook up wire, attaching them to the adjacent VCC and GND pins.
- Repeat this process, soldering the 3-core shielded cable to the DI, VCC and GND pins

- Pass the hook-up wires only through the hole in the laser cut plate and solder the blue hook-up wire from DO on the 7-bit LED ring to DI on the 12-bit LED Ring, allowing extra wire for strain relief
- Solder the red and black hook-up wires to the 12-bit LED ring to supply power from the 7- bit LED ring, also allowing extra wiring for strain relief
- Attach both LED rings to the laser cut plate using the M2x5mm bolts and nuts. At this point you can also attach the 3d printed diffuser using the same bolts
- Solder the 3-core cable to the D1 Mini ESP8226, ensuring the red wire attaches to the 5v pin, the black wire to the GND pin, and the blue wire to D4 (this is the default signal pin for WLED and can be reconfigured)
- Assemble the rocket beginning with one of the leg pieces, attach the largest ring to the middle slot, the smaller ring to the top slot, and the plate with the electronics to the bottom slot. You can then attach the other two legs, ensuring they are spaced evenly.
- Place the remaining side pieces within the slots to lock the rocket together; there should be one leg piece followed by three side pieces, repeating this pattern around the rocket

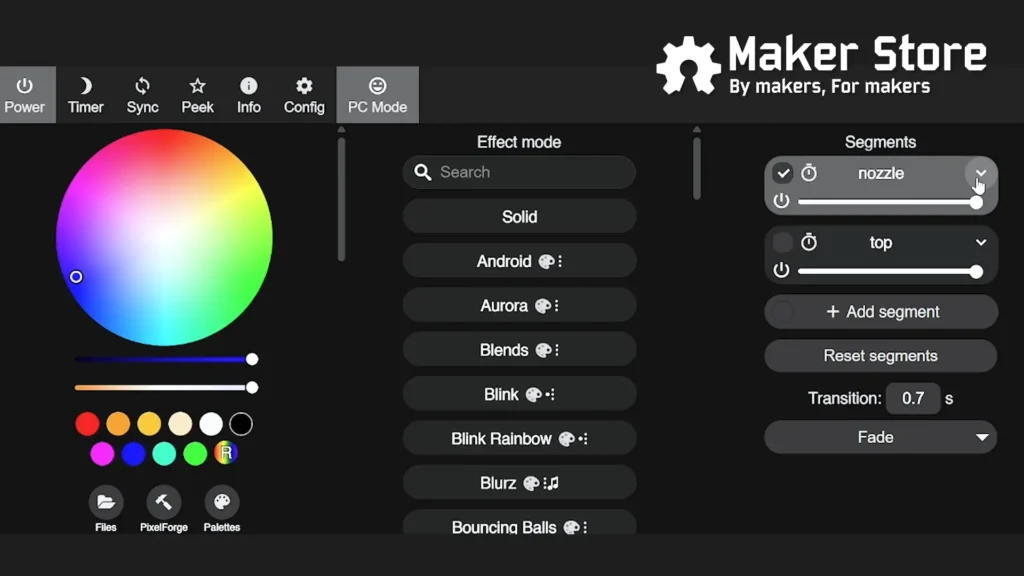
- Visit the device page to control the lights. To control the upper and lower lights separately, create two segments, one containing LEDs 0-7 for the rocket nozzle and another with LEDs 7-19.
Conclusion
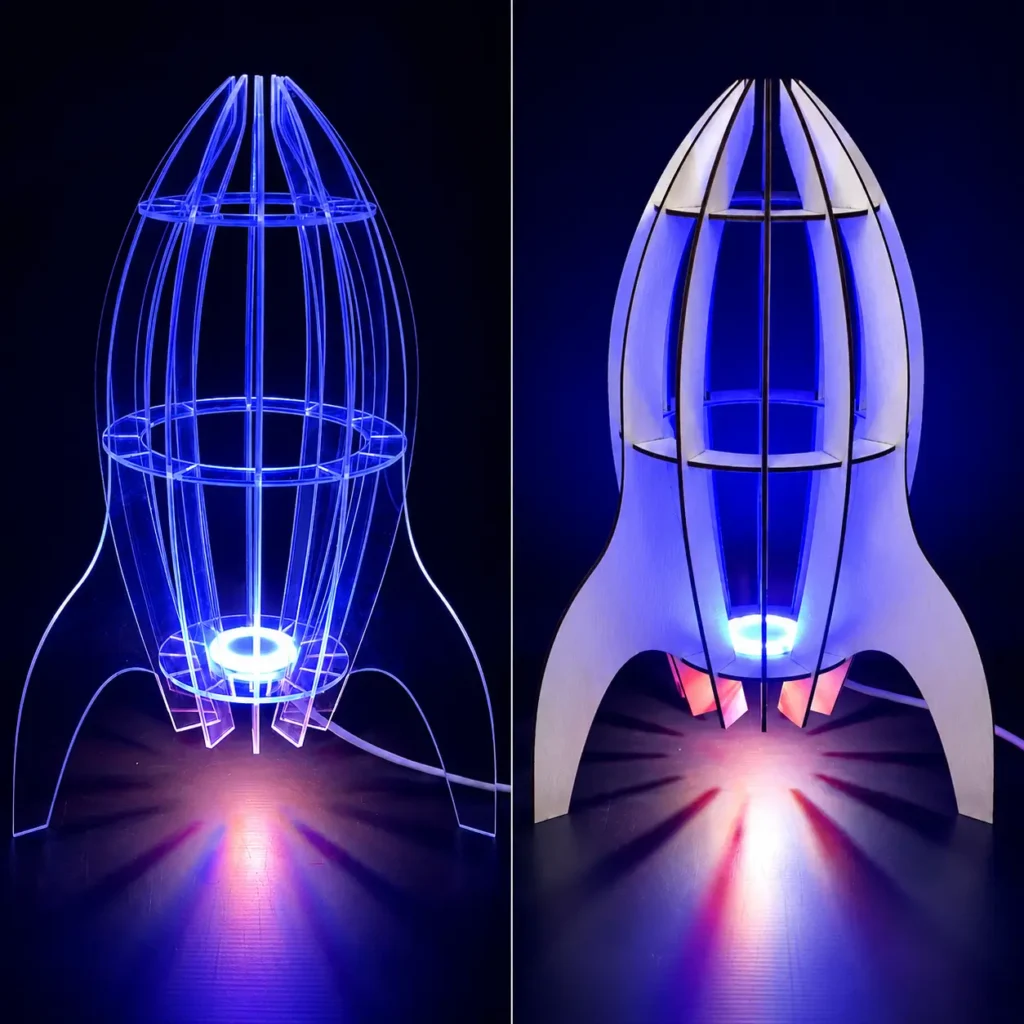
Enjoy your customisable LED Rocket Lamp! Experiment with the presets to create different colours and patterns. We used Fire 2012 for the nozzle to create a flame effect.
Links
- Thingiverse files: https://www.thingiverse.com/thing:3115510/files
- WLED Web Installer: https://install.wled.me/
Acknowledgements
A big thank you to the WLED team for creating such an awesome open-source project and web installer, and to bruce_cooner for the original Stubby Rocket design on Thingiverse. This project wouldn’t have been possible without their fantastic work.